Oracle JET tag cloud component to visualize data using new Dynamic Content Region (Part-3)
Learn how to provide drill-down functionality for Tag Cloud visualization


In this last part of the blog post, you will learn to implement drill-down functionality for an individual tag cloud item. In our example, the individual employee's name is presented in the form of the tag cloud item. But, we will need the employee code as a return value when the user clicks on the respective tag cloud item.
As a first step, you will have to make sure that you have enabled the selection mode in the tag cloud attribute. Check the first part of the blog where I have specifically mentioned the "selection-mode" attribute.
Now, Let's follow these simple steps to provide drill-down functionality :
PermalinkAdd hidden item to hold selected tag cloud item
Create a hidden item "P2_EMP_CODE" on the page to hold the selected tag cloud item. You will store the employee code in this hidden item and trigger dynamic action further to open the report.
PermalinkAdd Java Script code to catch selection event
Before we create dynamic action, we will need to process the "selectionChanged" event which is triggered when the tag cloud item is selected. There is no standard "drill" event available for JET Tag Cloud. So, you will mimic the drill-down event and the end user will also understand it that way. You can also provide multiple selections to the end user by making necessary changes in attribute and event code. I leave it up to you to explore it further.
Use the below code in the existing dynamic action code written for the "After Refresh" event with the "Execute Javascript Code" action. Please refer to part-2 of the blog series.
$("#TAG_CLOUD1").on("selectionChanged", function (event) {
    if(event.detail.value.length !== 0)
    {
        apex.item( "P2_EMP_CODE" ).setValue(event.detail.value[0]);
    }
});
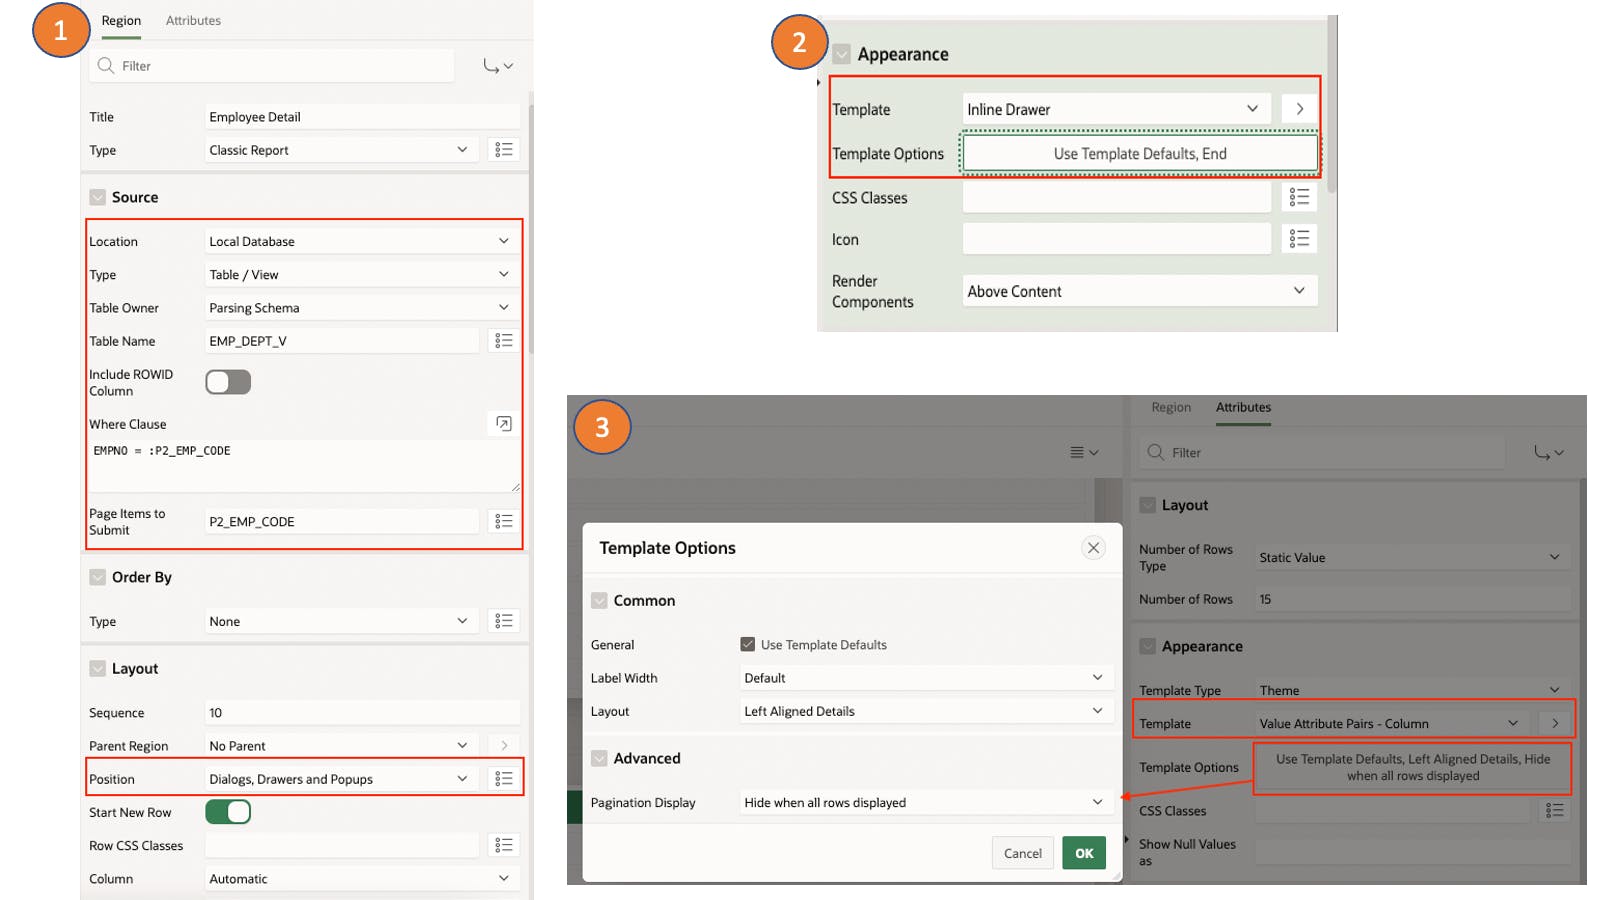
PermalinkAdd drill-down report
This step is just to give you an idea of how you can call a drill-down report. The drill-down report can be included on the same page or can be designed as part of a separate page. This is purely dependent on the requirements of the overall process. So, you can follow the steps as shown in the screenshot.
PermalinkAdd dynamic action to open the drill-down report
Now, the last step is to add dynamic action shown in the below screenshot to open the drill-down report.
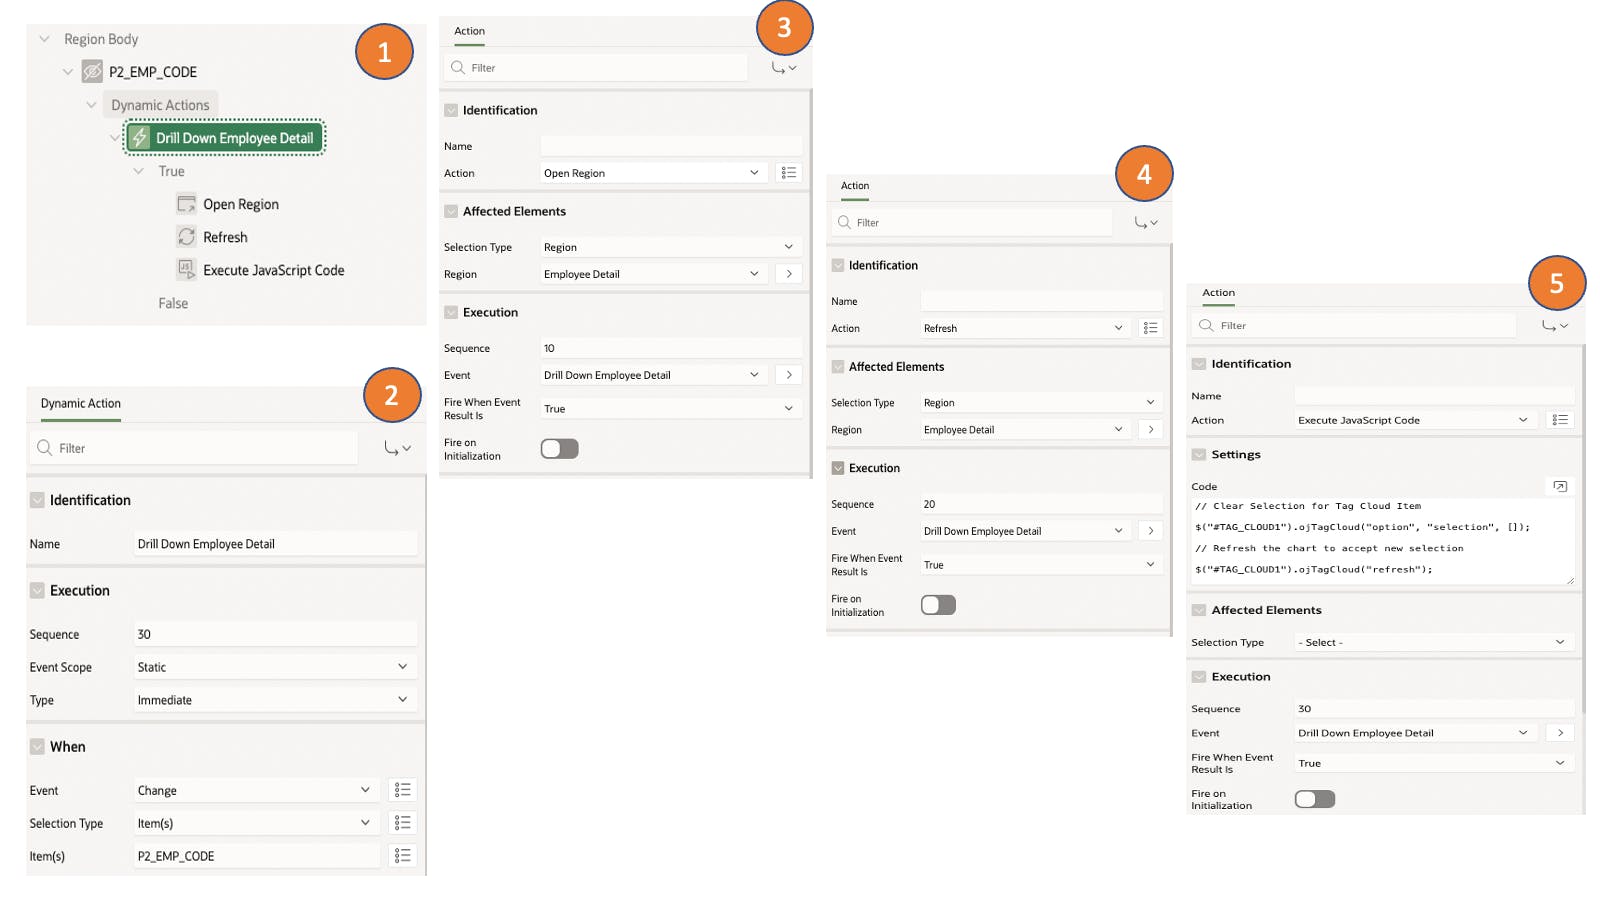
Below little code is important to mimic the drill-down event like standard declarative charts as we are first clearing the selection of a tag cloud item and refreshing the chart.
// Clear Selection for Tag Cloud Item
$("#TAG_CLOUD1").ojTagCloud("option", "selection", []);
// Refresh the chart to accept new selection
$("#TAG_CLOUD1").ojTagCloud("refresh");
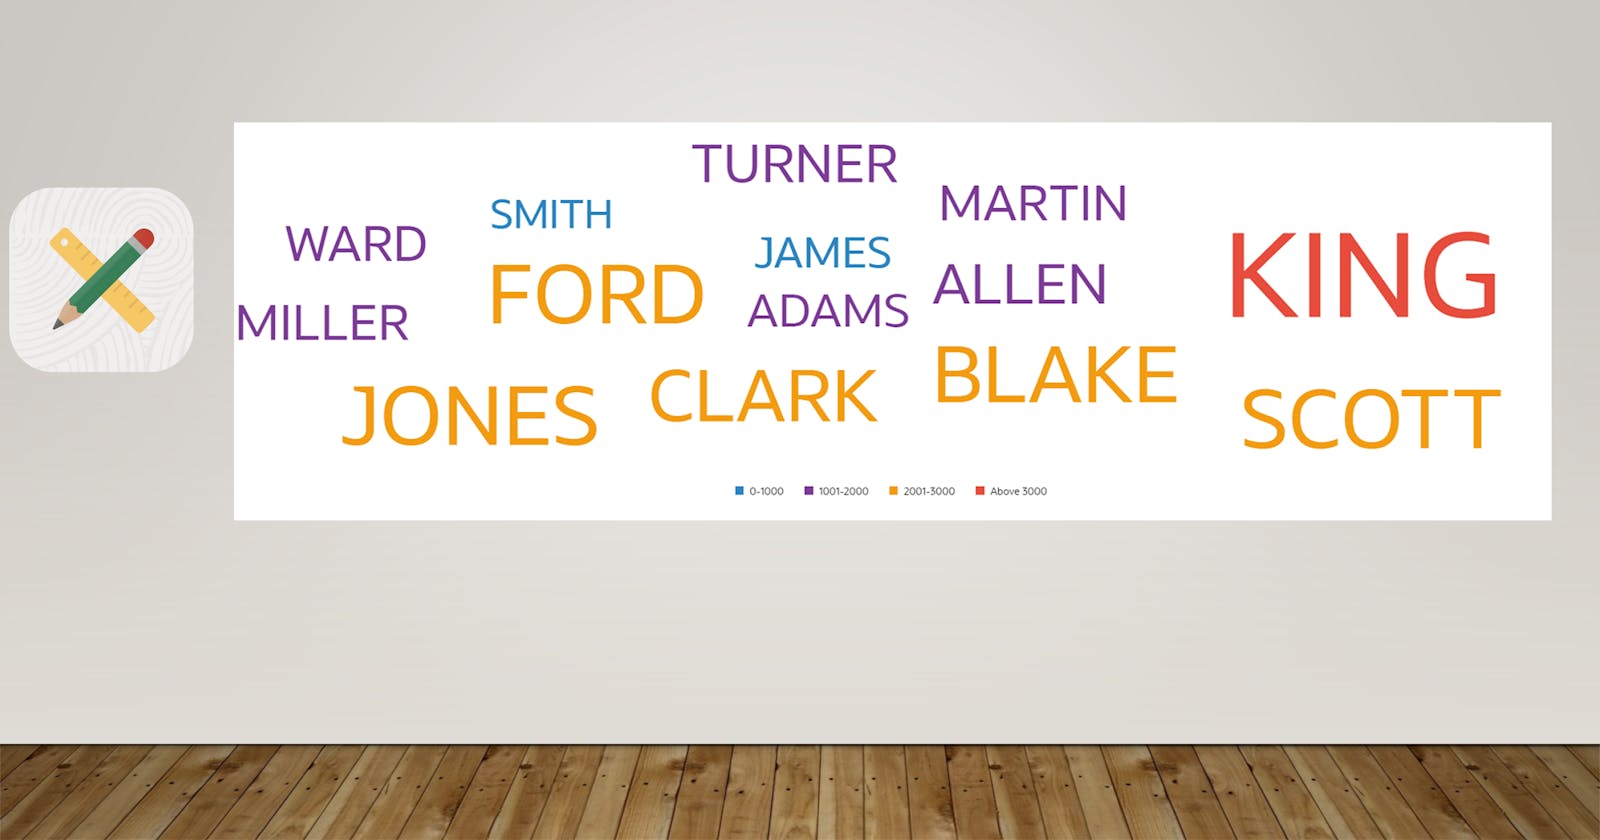
After completing all the above steps, you should be able to achieve the following result.

PermalinkSummary
I hope that the whole series of this blog has been interesting for you to understand the concept and its implementation. To continue your exploration to use JET visualization, I will suggest exploring the New Template Component plug-in type which is part of Oracle APEX 23.1. If time permits then, I will try to post content on this.
To get more information about Oracle JET visualization, I will suggest visiting the Oracle JET cookbook and respective APIs.
Subscribe to our newsletter
Read articles from directly inside your inbox. Subscribe to the newsletter, and don't miss out.
Article Series
Oracle JET tag cloud component to visualize data using new Dynamic Content Region (Part-1)
Introduction In the latest version of Oracle APEX 22.2, a new dynamic content region has been introd…
Oracle JET tag cloud component to visualize data using new Dynamic Content Region (Part-2)
In this part, you will learn the below functionality to provide a more intuitive experience to end u…
Oracle JET tag cloud component to visualize data using new Dynamic Content Region (Part-3)
In this last part of the blog post, you will learn to implement drill-down functionality for an indi…